
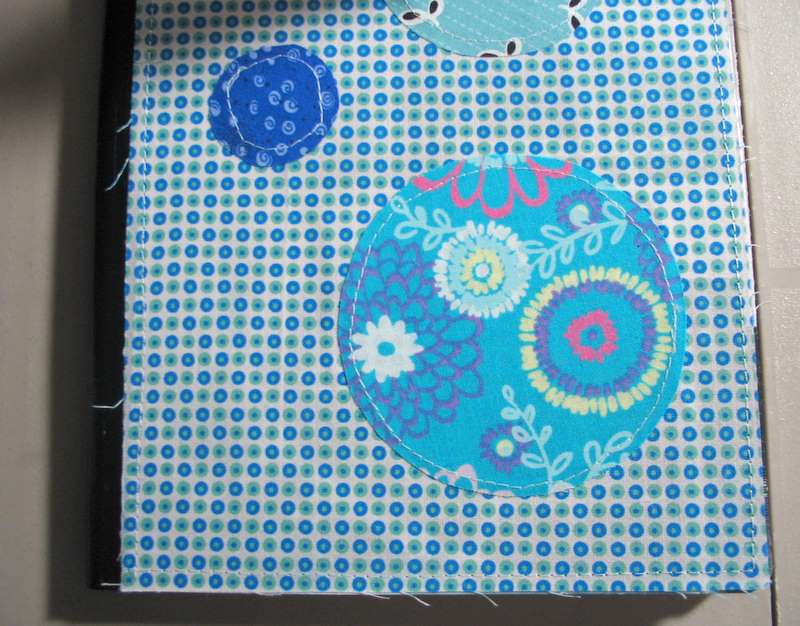
I like the idea of a fabric covered notebook and I was really hoping that just stitching it on to the cover would work. Two problems with this one. The fabric is a bit thin and you can still see the cover of the note in bright light. That could be fixed by using interfacing. The second issue is the fraying edges. I don't know if the interfacing would help with that at all. I don't have any fancy stitches on my sewing machine that would help either. This was the first (and probably the last) time I played with appliqued circles. How on earth do people do that???? So, I think the solution for this is that I need to not be so lazy and actually HEM the sides before stitching it to the cover. Stay tuned for take III.
Also, a friend of mine, Mary, has opened an Etsy shop. She is a painter. She has a few items up for sale, but promises to have more up in the future. I love the little Chrismas trinket box!
6 comments:
Looks great to me - what about now ironing on some iron-in vinyl - that would take care of the fraying edges if you folded the vinyl over to the inside.
Lindie at craftapple has a great tutorial for notebook covers http://craftapple.wordpress.com/2006/09/17/patchwork-notebook-cover-tutorial/
I use this glue type thing to stop fraying edges. It does not harden the fabric but just enough to hold the fabric in place.
Also I found out pinking shears works wonders too.
I dont have a fancy shmancy sewing machine too. :*)
You are so persistent! I always seem to have these kinds of questions too. We are often so inspired by what we see but then there are techniques we need to know ... I'll stay tuned!
How about just cutting the fabric a little larger than the cover, fold over and iron a small seam allowance, then stitch to the cover. Then you wouldn't have to hem before you sew.
I think it looks good. Even with the fraying. (And did you pray while sewing the appliques? That was my advice.)
I wonder if quilting batting would help cover the notebook cove. It would also pad it a little bit. (Although it might be harder to sew.)
I love the fabric. I have that same dotted fabric. I had a fat quarter and used it for Jack's crown, the baby's shoes, and some applique!! Is that a fat quarter/sample from your friend's mom? (I bought mine at Joann.)
I think the frayed edges give it a neat look, but I know you wouldn't want it to fray too much. I think fusible interfacing would help with the fraying and the see-through-ness. Also, I iron on fusible webbing to my fabric, then cut circles, then fuse them to the base piece before sewing the fabric on. Ironing it on before cutting ensures that the glue gets all the way to the edges. Then fusing them to the base fabric keeps the circles from bunching up when sewing. I went through the same frustrations as you, although I wouldn't know it from the result. Aren't notebook covers fun? Are you putting fabric on the back as well? I noticed that Sarah referenced my tutorial, but if you sew fabric to the front and back without actually making a cover, your method would be MUCH faster.
Cute! Keep it up! It's neat to see the creative process taking place.
Oh yeah - zig zags spaced close together work great for applique.
Post a Comment